Methods to Cook your Corn

Corn Cooking Methods

Corn has always been in abundance in Illinois in the late summer months and this season is no exception.  With many of our vendors selling a variety of sweet corn from their farms at an extremely affordable price we wanted to give you three easy cooking methods to use that corn you bought at the market for dinner tonight.

How to Make Delicious Corn on the Cob for dinner:

Boiling Instructions

  1. Husk your corn, pull off the silky threads, and cut out any bad kernels.
  2. Boil a big pot of water with your desired amount of salt (for a stock pot I usually use about ½ a tablespoon
  3. Once brought to a rapid boil, add corn and let boil for 5 minutes. And done!

Grilling Instructions

  1. Fire up your grill and let it get to a medium-high heat
  2. While the grill is preheating, remove the husk and silky threads off of your corn
  3. Grill for 15 minutes – flipping every 4-5 minutes either naked or in foil:
    1. Naked (just corn on the grates) – ends up with more of a char broiled taste but does not hold onto its sweetness and moisture as well
    2. In Foil (wrap your corn in foil before placing on grill) – you can choose to brush the corn with butter or olive oil to add a nice pop of flavor

Microwave Instructions

  1. Husk the corn, take off any silky threads
  2. Wrap each individual corn cob in moist paper towels
  3. Microwave 4 minutes for 4-5 ears of corn (for 1-2 ears cut down to 3 minutes)


Ideas for topping that delicious corn on the cob:

  • Olive oil – flavored from vendor, The Olive Oil Experience is our first choice
  • Butter and sea salt (traditional but delicious)
  • Mayonnaise (or plain Greek yogurt for a healthier option)
  • Add some spice: chili pepper, cayenne pepper, black pepper, cumin, garlic salt, or whatever else makes sense to you
  • Add some herbs: cilantro or dill make great additions
  • A squeeze of lime – especially delicious with mayonnaise and spicy seasonings
  • Herb Butter (make this ahead of time for parties): In a mixer add butter, parsley, dill, garlic, scallions, lemon juice, salt, and pepper and mix well. Scoop into an ice cube tray or into a margarine dish and place in refrigerator to set.  Serve in individual pieces for your guests or family.

Check out your local farmers market for a variety of delicious sweet corn this week!

See you at the market!

-Nikki

Cherry Tomatoes

Cherry tomatoes!

cherrytomatoes1

Quick note: Produce is seasonal and for the best local produce we need to be patient.  Tomatoes are the most asked about produce item at our farmers markets.  Everyone wants to know when they can get them.  Cherry tomatoes are usually ready first and then the big juicy tomatoes start turning red shortly after.

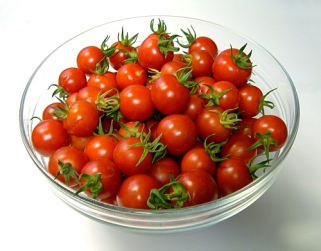
What is a cherry tomato?  A Cherry tomato is a round miniature tomato with a glossy red (or sometimes yellow) skin.  Cherry tomatoes are sweeter than regular full sized or grape tomatoes. 

Choosing the best cherry tomato carton at the market: Look for cherry tomatoes with firm skin and deep coloring.  Avoid wrinkly, shriveled looking fruit or ones that look like they’ve “burst”

Storing your cherry tomatoes once you get home:  This tends to be an argument among different homes on whether you keep your tomatoes out on your counter or keep them in your fridge.  Cherry tomatoes seem to do pretty well either way but do tend to last slightly longer in the fridge.  If you buy or pick tomatoes that are not quite ripe yet always place them on your counter top for a day first, they will ripen up – and then you can decide whether to keep them on your counter out of the sun or if you want to store them in your fridge.  Personally, I keep mine out on the counter if my A/C is on because they’re never there long enough for us to have issues with them starting to break down and we prefer the taste they have right off of the plant.

Prepping your cherry tomatoes:  Super easy!  Just a quick rinse and they’re ready for whatever you would like to use them for.

How do I use my cherry tomatoes?

  • Raw.  Just rinse them and eat them with the rest of your raw veggies. I pack some and take them to work for snacking.
  • Roasted.  Using a little salt, pepper, and olive oil, pop them in the oven and wait until they get really red and sometimes even burst a bit.  I throw mine in with my baked chicken recipes for the last 10 minutes to add a touch of flavor to my chicken.  (Plus, you can still eat them after they’ve burst.)
  • Salads.  Whether you just throw them in whole or cut them in half and throw them in to get a bit of the liquid… Cherry tomatoes always taste delicious in salads.  I prefer adding tomatoes to salads that I’ve also put hard boiled eggs in but I also don’t mind them in a normal garden salad with some bell peppers.
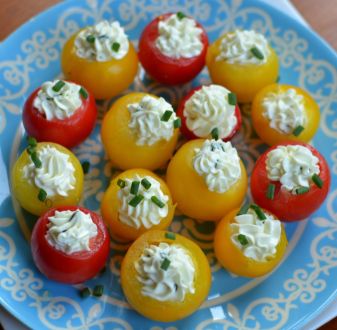
  • Stuffed!  This awesome recipe comes from SmallTownWoman.com

Herb-Cream-Cheese-Stuffed-Tomatoes-2

Herb Cream Cheese Stuffed Tomatoes

  • 20-24 cherry tomatoes
  • 8 oz cream cheese, softened
  • 1 large clove of garlic, minced
  • 2 Tablespoons freshly chopped chives (or garlic chive), half of this is for garnish
  • 8-10 basil leaves cut into small pieces
  • Salt to taste
  1. Slice a very thin slice of tomato off the top of each tomato. Using a small melon baller or spoon gently remove the guts from the tomato.
  2. In stand mixer beat cream cheese until smooth. Turn mixer down to low and add garlic, chives and basil. Add salt to taste. Using spoon or piping bag add cream cheese mixture to tomatoes. Top with reserved chives
  3. Serve and enjoy!

 Hope you all pick up some cherry tomatoes this week!  You won’t regret it!

See you at the market!

-Nikki

It’s Blueberry Season!

Blueberries Galore

blueberry closeup

Late July through mid-August is always a great time to find blueberries and peaches at the local Midwest farmers markets.  Farmers either bring them in from their own farms or bring them in from a friend or partner’s farms.  (Note: If an item at an Illinois Farmers Market does not come from that farmer there will always be a little sign with the farm it came from and that farm’s location.)  This week we will focus on storing, freezing, and eating your blueberries.

Blueberries

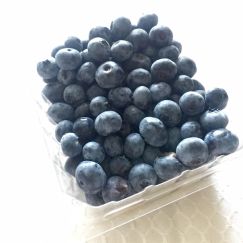
Best way to store them:  Blueberries are usually sold in “clamshell” containers.  You can either put these directly in your fridge or for even better results you can take the berries out, wash your clamshell with hot soapy water and rinse and dry thoroughly, fold up and place a dry paper towel in your clamshell, and put berries back in on top of the paper towels before placing in fridge.

What do I do if I find a couple berries with mold on them?  Berries in general can rapidly grow mold because of the moisture they pick up.  If you find a couple of moldy berries in your shell – discard the ones growing mold, don’t rinse them off – and to be sure the rest don’t have their own spores you can dip your blueberries in a bowl of 1 part white vinegar to 2 parts water for 1-2 minutes.  Do not soak for longer than 1-2 minutes or your berries may pick up the taste of vinegar.  After their dip, rinse your berries really well (until the vinegar smell is gone) and then place them on a paper towel to pat dry before eating or refrigerating again.

Can I freeze my berries for later in the season? YES! Blueberries freeze really well and safely last for 6-8 months.  Wash your blueberries, pat them dry, lay them out in a single layer on a baking pan, freeze for 2 hours, and then transfer them to an airtight zip plastic bag.  Now you have local, fresh berries for the fall and winter!  (To defrost and use them, place desired amount in bowl and let sit until it reaches room temperature – or add them into your smoothies frozen like I do.)

Ways to eat your blueberries:

  • Raw, as a snack. You can eat them by themselves or mix them in with other fruits.  Strawberries and pineapple tend to be good complementary fruits.
  • Add them to your pancakes! Whether you make your pancakes from scratch using local flour or you use a baking mix, every pancake can get just a little better with the help of a handful of blueberries.
  • Sweet Fruit Pizza. Roll out a sugar cookie dough crust to cover the bottom of your pan and bake until it’s a cookie. Top with a blended mix of marshmallow fluff and cream cheese.  Top with blueberries and/or other fruits.
  • Blueberry Margaritas – yes I went there. Take 2 cups blueberries and blend with 3 oz of lime juice and strain juice into a shaker.  Add 5 ounces tequila and 2 ounces orange liqueur.  Shake, Shake, Shake, and pour over ice.  (Serves 2-3)
  • Blueberry Yogurt Dessert bites: Mix 1T sugar or stevia and 1 cup vanilla greek yogurt, fold in a pint of blueberries (slowly to not smush them), spread out on a baking sheet lined with parchment paper, freeze for 1 hour, and done! (If you use stevia and low fat greek yogurt you can eat about 15 of these for 40 calories)
  • Berry salad. Toss some blueberries in with your favorite greens.  Add some feta cheese, almonds, and a lemon or poppy seed vinaigrette and you have a masterpiece of a salad.

There are also muffins, cheesecakes, cobblers, breads, smoothies, popsicles, scones, jams, and so many other wonderfully easy things you can make with blueberries so take a look on your own today and see what you can do with a fresh, local pint of blueberries.

blueberry face

See you at the market!

-Nikki Lee

Beets: How to choose them and use them

Beets!


Quick fact: Beets have a strong color pigment that can actually stain your skin.  But don’t worry, if you stain your skin while prepping your beets you can rub lemon juice on the stain to remove it.

Choosing the best beet at the market: To choose the best beet go for small to medium-sized beets that have firm roots and skin that is smooth and deep in color.  Avoid beets that have spots, bruises, or soft wet areas which may be signs of spoilage.   If the beet or root looks shriveled you may also want to avoid at this may be a sign that it will be tough and fibrous.

Storing your beets once you get home:  When you get home do not wash your beets until you are ready to prepare for eating.  You’ll want to remove most of the greens and stems and just leave about 2 inches of the stem.  (Otherwise the leaves and stem will steal all the moisture.)  Place the beets in an airtight plastic bag – if you get as much air as possible out your beets can last in your fridge for up to 3 weeks!

Prepping your beets:  For best preparation, while wearing gloves rinse your beets under a gentle cold stream of running water.  If the skin is tender enough you’ll want to keep it intact in order to maintain the highest amount of health benefits – if it’s not tender enough then just gently rub the skin off with a paper towel.  Cut the beets in quarters leaving 2 inches of the tap root and one inch of stem on the beet.

How do I use my beets?

  • Roast them in coconut oil. Dice up your beets, throw them on a pan, drizzle in coconut oil, sprinkle on some coarse salt, and roast them at 400 degrees for 35-40 minutes.  When they are done they will look slightly caramelized and slightly crispy.  You can leave them in a bit longer if you like them crispier.  You can eat these alone or throw them into your favorite salads.
  • Eat it in a sandwich. Roast your beets, add some goat cheese and arugula and serve on some artisan bread. Sounds fancy and delicious.
  • Add 1 beet root, 1 carrot, 1 apple, and a touch of lemon juice and you get a fun, health packed smoothie.
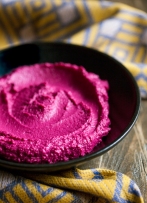
  • Make a pretty pink and delicious beet hummus like this one from thefullhelping.com:

Creamy Roasted Beet Hummus

Roasted-beet-hummus-2

see the original post here

  • 2 medium sized beets
  • 1¾ cups cooked chickpeas (or 1 can chickpeas, drained and rinsed)
  • ½ teaspoon (heaping) salt
  • 3 tablespoons tahini
  • 2 tablespoons lemon juice
  • 2 tablespoons water
  • 2 tablespoons fresh rosemary (optional)
  1. Preheat oven to 375 degrees. Wrap beets in foil and bake for 30-40 minutes, or until they can be easily pierced with a knife. Run beets under cold water for a few moments, and when you’re sure they’re cool, slip the skins off with your fingers. Quarter beets and set aside.
  2. Place beets and chickpeas in a food processor and pulse to combine. Add the salt, tahini, lemon, and water. Process the mixture for a full 2-3 minutes, or until the hummus is super creamy, stopping to scrape down the bowl now and then.
  3. Pulse in the rosemary (omit it if you don’t care for it).
  4. Serve with crackers, pita chips, or other veggies and Enjoy your bright pink hummus

There are lots of other ways to use beets so google some for yourselves and try them out this weekend from the market!

Have a great week and see you at the markets.

-Nikki


Produce Monday: Zucchini

Zucchini

Zucchini

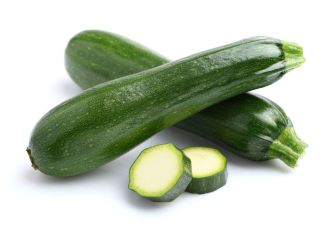
Zucchini is a summer squash that can grow up to 3 feet but is usually picked when they are about a foot long.  The most common zucchini comes in a couple shades of green but there is also a golden zucchini which comes in yellow.  Botanically, zucchinis are technically considered a fruit but zucchini is usually used as a vegetable and added in savory dishes – but can also be used in sweet baked goods.

Quick fact: the longest zucchini ever recorded was in Ontario, Canada in 2014 and was 8.3 feet!

Choosing the best zucchini at the market:  The best zucchini are usually 6-8 inches long, are still a bit thin, and feel heavy for its size.  The skin should for the most part be blemish free and should not have overly soft spots.

Storing your zucchini once you get home: If you’re not freezing them, Do NOT keep your zucchini in a closed air tight plastic bag in your fridge – it will cause it to ripen very quickly and you may find a mashed/moldy looking zucchini in your fridge a few days later.  If you want to keep it in a bag in your fridge, don’t wash it before refrigerating and just make sure your bag is only loosely closed.  To freeze, wash and cut zucchini into small chunks and place in a freezer bag.

How do I use my zucchini?

  • Zucchini bread! I will add my recipe to the end of this post but you can also use one of your own.
  • Zucchini can be cut with a spiral cutter to make into “noodles” (just cook in a dash of olive oil for a couple minutes and use it the way you would for normal noodles.)  Or cut into chunks or slices and add to your pasta just as it’s finishing boiling and drain with the noodles to bring in a fun and delicious texture.
  • Zucchini Dip. Slice your zucchini in half, bake in your oven until lghtly browned and tender.  Throw the baked zucchini into your food processor with some tahini, garlic, salt, pepper, and a bit of lemon juice and pulse until you have a creamy dip.  For dipping items you can use pita chips, crackers, or even vegetables.  It also works as a delicious spread on your sandwiches or pita recipes.
  • Healthy protein snack. Cut your zucchini in half (“hot dog style.”)  Scoop out a bit of the inside (or don’t if you want your protein boat to be thicker) and add tuna to the middle for a really healthy snack or your favorite tuna salad recipe for a slightly less but still healthy snack.
  • Zucchini Chips. Slice your zucchini into coins.  Season with your favorite seasonings – you could go spicy or just herbs and pepper.  Bake at 375 until nice and brown.
  • Raw veggie snack. Slice into bite sized pieces and eat them!
  • Zucchini Low-Carb pizza on the grill. Cut your zucchini into thick coins (¼” to ½” inch is good.)  Brush or spray zucchini with oil and the grill for 2 minutes on each side.  Top grilled zucchini with marinara and mozzarella and place back on foil on the grill for 2 more minutes.

There are literally thousands more recipes to use zucchini for and I strongly suggest you do some googling or cookbook researching but here is my favorite zucchini bread recipe:

Easy Zucchini Bread

*Yields 2 Small Loafs

  • 3 Cups of Flour
  • 1 Teaspoon of Baking Powder
  • 1 Teaspoon of Salt
  • 1 teaspoon of Baking Soda
  • 1 Tablespoon of Vanilla
  • 4 Eggs
  • 1¼ Cup of Vegetable Oil
  • 2 cups of White Sugar
  • 2 Zucchini – Grated
  • 1 Cup of Walnuts – Chopped (optional)
  • 1 cup of chocolate chips (optional)

Instructions

  1. Preheat oven to 350 degrees and grease 2 loaf pans
  2. Mix your dry ingredients. Flour, salt, baking powder, baking soda, and cinnamon into a bowl
  3. Mix your wet ingredients in a second bowl – oil, vanilla, eggs, and sugar
  4. Slowly add your dry mix into your wet mix and then add in your zucchini and optional walnuts/chocolate chips.
  5. Pour Batter into the loaf pans and bake for 1 hour – for bread they usually say your loaf pan should be about half full (at this time I also sprinkle a little cinnamon on top)
  6. Bake for 45 minutes to an hour until toothpick inserted comes out clean.
  7. Let it sit for 30 minutes (or until cool) before cutting. Serve and Enjoy!


Hope you all come out the market and try out your own produce recipes!

See you at the market,

Nikki

Garlic Scapes: Underappreciated but Beautiful and Delicious

The last few weeks I’ve been asking the farmers what they would suggest for produce Monday and last week several of them mentioned this fun veggie that I had never heard of and it’s called a Garlic Scape.  Most of them mentioned that this vegetable was easily one of their favorites that “just didn’t receive enough love or attention.”

So what’s a garlic scape?  A garlic scape is the flower portion of the garlic plant that is cut off in June each year that allows the plant to thicken up, focus all its energy on the bulb and its division into cloves, and give us awesome garlic later on.  The flower buds of the garlic are clipped off and the shoot of the flower makes for a fun addition to a flower bouquet or can be used in any of your favorite recipes that call for garlic.  The scapes have the same great flavor as their garlic bulbs but are brighter in flavor and color so they add a nice touch to any savory dish.

Scapes can be used in any recipe calling for garlic but they can also be used on their own.  Here is a great easy recipe for scapes that is ridiculously easy:

Sautéed Scapes:

  • Handful of scapes
  • 1-2 tablespoons olive oil
  • Salt and pepper to taste
  • Spritz of lemon juice

Instructions:

  1. Slice off the pod and tips and then cut into pieces (either ½ inch or  2-3 inch pieces)  *note: the whole scape is edible but the pod and tip are very fibrous so for most people you’ll want to just cut these off
  2. Heat olive oil in a skillet. When oil is fragrant, add scapes.  Season with salt, pepper, and lemon.
  3. When heated through. Take off skillet and serve as a delicious side dish J


Storage: Scapes can be stores in a paper bag for up to a month in the fridge or if you blanch and freeze they can last up to 6 months!

Hope you enjoyed your 4th of July and this week will go pick up some scapes at the market and try them for yourself!

See you at the market,

Nikki

Cabbage: Both medicine and food since at least 600 B.C.

IMG_4260

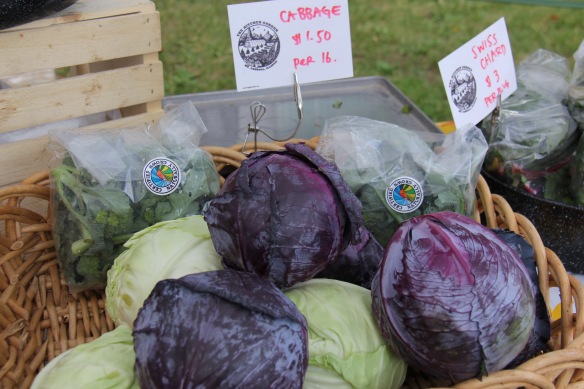
These beautiful cabbages are from The Kitchen Garden!  Find her at the Rockford City Market on Friday nights

What is cabbage?  Cabbage is a vegetable that has thick purple or green leaves that grow in a spherical “heart” or “head.”  It has been used for centuries as both food and medicine throughout the world.  The Ancient Greeks and Romans used it for treating many health conditions and cabbage’s use can be documented as far back as 600B.C. in Europe where it was said to be brought in by Celtic wanderers.  Irish, German, and Korean populations are well known for making use of its strong flavors and fermentation abilities in items such as sauerkraut, coleslaw, steamed cabbages, and kimchi.  And Dutch sailors even once used it to prevent scurvy on long sailing trips!

What does cabbage taste like?  Cabbage has a slightly bitter but also a slightly sweet flavor – with a bit of a crunch.  When cooked, cabbage has an almost buttery taste and has a “melt in your mouth” texture.

How do I pick out a cabbage at the market?  Choose heads of cabbage that are firm and dense with shiny, crisp, and colorful leaves.  Avoid cabbage with cracks, bruises, or serve leaf damage.  We also recommend always buying a full head and not one that is pre-halved or shredded because once it’s cut and sits it begins to lose nutrients.

How do I store a cabbage once I’m home?  Red and Green cabbage can stay fresh for 2 weeks if you store it correctly.  Place your cabbage in a plastic (or produce) bag and store it in the crisper in your fridge.  Once you cut your cabbage, cover it tightly with plastic wrap before placing it back in the fridge.  Cut cabbage should only be kept a few days to maintain optimum flavor and nutrition.

What can I do with cabbage? 

  • Roast it! Slice it vertically and have little cabbage “patties” roast them with olive oil and garlic for 30 minutes at 425 for an easy delicious side dish (not a garlic fan?  Lime and Siracha can also be a great topping)
  • Coleslaw! Break out your favorite recipe or find one online.  My favorite has apples, onions, and carrots mixed in with a beautiful green cabbage, honey, mayonnaise, and apple cider vinegar.
  • Make some soup! You can make a ton of different soups using just chopped cabbage and whatever other produce you find at the market or store. Just make sure you sauté your tough produce (celery, peppers, onions) before adding in your stock/water and softer vegetables.  An easy healthier go-to is the GM soup which calls for cabbage, tomatoes, celery, onion, green pepper, and vegetable stock… it’s totally okay to add hot sauce too 🙂
  • Freshen up those fish tacos! We add sliced red cabbage to our fish tacos to add a bitter yet fresh taste to break up the grease that sometimes comes with fish tacos.
  • Make a Reuben sandwich!  Grab some corned beef, buns, Thousand Island dressing, Swiss cheese and add your own homemade sauerkraut recipe.  Don’t have your own sauerkraut recipe?? Try this easy one:


Easy Homemade Sauerkraut:

(Sauerkraut is easy to make but requires patience to let sit and become delicious and healthy so keep that in mind!  However, it lasts 6 months to a year so you may only need to make it once or twice a year depending on much you love sauerkraut.)

  • 1 head of cabbage
  • 1-2 Tbsp. sea salt
  • 2- 1 quart Mason jars
  • Cheesecloth
  • Possibly: 1 cup water, 1 t. salt
  1. Peel off first couple outer leaves of cabbage and cut off stem. Cut cabbage in half, and then slice into thin ribbons.
  2. Prepare a mason jar by washing and sanitizing it.
  3. Place cabbage in a large bowl with sea salt and mix using your hands, squeezing firmly as you go. Do this for about 5 minutes.  Your cabbage should start wilting and releasing its water.
  4. Let it sit for 10-15 minutes to allow it to break down in the salt.
  5. One it has been sitting, place the cabbage in your jars (1/2 in each), pressing down firmly and making sure it’s packed in tight. Add the liquid from your bowl over the top of your cabbage – all the cabbage should be covered.  (If you do not have enough to cover you will want to add more liquid, combine 1 tsp of salt to 1 cup of water and mix, use as much as needed of that to cover.)
  6. Cover the top with cheesecloth and set in a cool, dark place for 2-3 weeks. Watch over it to make sure there is enough liquid to cover but do not cover it with a lid as the gases will need to be able to escape.
  7. After 2-3 weeks, remove cheesecloth, cover with lid and store in your refrigerator. Homemade sauerkraut can last in a mason jar in the fridge from 6 months (easily) to a full year.

There will also be cooking demos this Friday (July 1) at the market at 5pm and 6pm using cabbage.  They will be making a pineapple and cabbage salad and handing out samples and recipes so go check that out!

Hope you enjoy!

-Nikki


#producemonday: Kale

Kale

kale 1

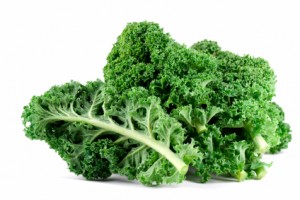
What is Kale?  Kale, also known as leaf cabbage, is a vegetable with curly or frilly purple or green leaves.  It is considered part of the cabbage and broccoli family but does not form a head like cabbage does, instead it has individual big leaves that shoot out from its center.

How do I choose Kale at the market?  Check for leaves that feel firm and that are deeply colored.  Stems should also be moist and strong (but not slimy.)  Avoid leaves that are browning or yellowing and look overly wilted.  Wilted leaves may alter the taste and smell of the kale and could also be a sign that it is starting to go bad.

How do I store it once I get home?  When you get home place kale in an airtight bag in your refrigerator.  Do not wash until you are ready to use as extra moisture may lead to early spoilage.  Kale usually lasts about 5 days in an airtight bag in the fridge.

What are the health benefits of kale?

  • High in antioxidants!
  • Low calorie for a great punch of healthy. Only 33 calories per cup.
  • Full of essential minerals including calcium (9% of daily), potassium, copper, and iron (6% of daily).
  • Great source of Vitamins: K, A (over 200% of daily), C (over 100% of daily which is the same as an orange!), and B
  • Contains essential heart-healthy omega-3 fatty acids
  • Nice source of Protein: contains 2 grams per every cup
  • Fiber! (there’s at least 1 gram per every cup) – great for digestion as well as controlling cholesterol levels

What are some ways that I can prepare my kale?

  • Kale Chips! – Cut off stems, tear leaves into bit sized pieces, place onto cooking sheet (preferably on parchment paper), drizzle with a tiny bit of olive oil/spray (too much will lead to soggy chips), season with a bit of sea salt or other seasoning of choice, and bake at 350 for 10-15 minutes until the edges are lightly browned (but not burnt.)
  • Easy Sautéed Garlic Kale side dish – cut into 1 inch pieces, heat oil and garlic clove in skillet until sizzling (1-2 minutes), add kale on top and place cover over pan. Stir occasionally with tongs and in 5-7 minutes you’ll have pretty bright green and slightly tender kale to serve.
  • Parmesan Kale Grilled Cheese – get 2 pieces of your favorite bread, add some shredded parmesan, kale, garlic powder, and another melting cheese of your choice. Grill them up on your skillet or griddle and you have a healthy, tasty take on the grilled cheese.
  • Kale Salad – try using kale as your green in your lettuce and add nuts, berries, chicken, or other favorite salad toppings and see what you can come up with. My go to lately has been to switch out my romaine for kale in my Caesar salads because kale and parmesan seems to be a match made of heaven and with a little seasoned chicken it really makes it delicious.
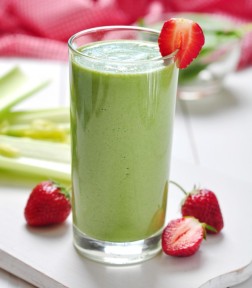
  • Kale Smoothies! Add kale to your favorite smoothie to make an awesome tasting (and looking) smoothie.  I found this recipe a while back online and I highly recommend it.  Try it out yourself.  Recipe is listed below and you can see the original by clicking on the recipe title.


Kale-A Berry Smoothie

Prep time:  5 mins        Cook time:  5 mins        Total time:  10 mins        Serves: 1

Ingredients

  • 1 banana
  • 3 whole strawberries
  • 1 handful kale
  • 1 Tablespoon honey
  • 2 ice cubes
  • Sweetened almond milk to the fill line (regular milk and coconut milk also work well)

Instructions  Combine your ingredients. Blend in your favorite blender until thoroughly blended and uniform.  Pour into glass and enjoy 🙂

Kale has a ton of health benefits and so many great ways to serve it and I hope you can share some of your favorites as well.

Thanks!

Nikki Lee, Vendor & Accounting Manager, RRDP

How to Enjoy Spinach like Popeye

Spinach

spinach_popeyeleaf

Growing up the main thing about spinach that I can remember is that it gave Popeye the Sailor Man super strength – and if it gave Popeye super strength to save his friends then it’s obviously something I wanted to eat too.  Popeye ate his out of a can but we can get ours fresh at our local farmers market!  Today we’re going to learn what spinach is, what the health benefits are (besides giving super strength to cartoon heroes), how to pick it out and store it, and most importantly, how to use it.

What is spinach and what does it look like?  Spinach is a leafy plant that grows well in our region from March through early June.  There are three types of common edible spinach that you’ll find most often: savoy, dark green and wrinkled looking with a crisper flavor; flat-leaf, the smooth surfaced leaf most commonly used for frozen and canned spinach; and Baby spinach, the slightly smaller, rounded leaf spinach that are common in salads that have the sweetest flavor of the 3.  All 3 can be used interchangeably but have slight flavor and texture differences.

spinach variations

What are the health benefits of spinach?

  • Phyto-nutrients that aid in disease prevention
  • Low in calories and fat but has a decent amount of soluble fiber to aid in digestion in weight management and cholesterol control
  • 2-3 cups of spinach leaves (one salad) will give you 25% of your daily iron intake
  • Leaves are full of vitamins A, C, and K which help you age better, grow stronger bones, fight free radicals that lead to illness, and aid in brain function
  • Contains minerals like magnesium, potassium, copper, and zinc. These minerals help control blood pressure, aid in red blood cell production, and regulate growth and development as well as digestion.
  • Also, a great source of omega-3 fatty acids!

How to pick spinach out at the market or store: Choose spinach leaves that are dark green and healthy looking.  Avoid spinach leaves that look like they’ve started to brown or wilt or have yellow spots as these are usually signs that your spinach will not last as long.

How to store spinach:

  • Spinach can last about a week in your fridge if they’re in an airtight plastic container or bag. Do not wash spinach before storage to avoid excess moisture that leads to slime early wilting. Spinach will survive just fine in the plastic produce bag you get at the store but tend to last a couple extra days if you place them in a plastic container with some paper towels throughout to catch moisture.  The container method may also keep them safe from being bruised or squished by your other items.
  • Spinach can last 10-12 months in your freezer if you blanch them – which is a culinary term for basically shocking your veggie by boiling then freezing. Here’s how to do it: (1) Wash spinach and cut off the stems; (2) Now Blanch (plunge into boiling water) for two minutes and then chill quickly in ice cold water; (3) Drain off excess moisture and pat with paper towel, package in airtight containers or freezer bags and freeze immediately.  And now you have frozen spinach to pull out throughout the year for cooking!

How can I use spinach?

  • Fresh, just rinsed leaves can be used in salads or to replace your regular lettuce on sandwiches or burgers. For salads I would recommend just adding some feta, chicken/salmon, nuts, and dried fruit for a delicious salad anytime of the year
  • Wilt some and use it in your omelets or scrambled eggs in the morning. I usually roll my leave into little tubes, slice them, and then throw them in a pain for a minute or two with some oil before adding my eggs
  • Add them into the cheese layers of your lasagna. Or even stuff them with mozzarella or feta into your chicken or crescent rolls.
  • Blend up a green spinach smoothie, I call this one Popeye’s Summer Paradise Smoothie: just add spinach, pineapple, ice, avocado, and water to your blender for a nice healthy smoothie. It will make you strong, keep you healthy, and also tastes pretty good.
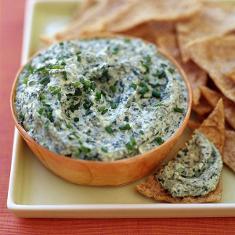
  • Make a quick and easy Spinach Dip like the one I use from the 2004 Ogle County Hospice Anniversary Cookbook:

spinach dip

Spinach Dip

  • 2 cups mayonnaise
  • ½ cup parsley
  • ½ small onion (chopped)
  • 1 garlic clove
  • 1 T lemon juice
  • ¼ tsp. ground black pepper
  • 10oz frozen chopped spinach (thawed and drained) or 2 cups wilted chopped spinach (throw on skillet with a tiny bit of oil and let wilt for 1-2 minutes until soft)

In covered blender (or food processor), blend all ingredients at high speed just until finely chopped.  Pour into bowl and cover, place in refrigerator for at least 4 hours. Serve cold or either pop in microwave for a few minutes or serve in a mini crockpot on keep warm.  *Makes about 3 cups and can be made up to 2 days before serving.  Serve with sliced baguettes, pita chips, or crackers.


Spinach has a million uses.  Pick up some this week at your local farmer’s market and either try one of the ideas listed above or find a fun recipe of your own.  You can’t go wrong.

See you at the market!

-Nikki Lee, Vendor & Accounting Manager, Rockford City Market and North End City Market
Arugula: “Salad Rocket!”

Arugulaarugula

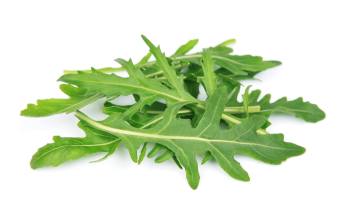
Arugula (also awesomely known as “salad rocket”) is a dark green salad leaf vegetable with a slightly bitter, pepper taste commonly used in salads.  Arugula is often used with spinach in salad mixes but is also used on pizzas, pasta dishes, and fish dishes as a “palette cleanser” because of its sharp flavor.  There is generally a difference in taste between the arugula you get in the store that has traveled from another state versus the arugula you get from your local area.  Arugula from the local area tends to have a more distinct peppery flavor whereas the grocery store version tends to be much milder (and sometimes almost bland.)

Health Benefits: The main benefits that come from arugula include weight management, eye health, heart health, blood pressure balance, help in fetal growth in pregnant women, and it has been linked to anti-cancer, anti-diabetic, and anti-inflammatory properties.  Arugula is only 8 calories for 2 cups, is considered one of the top 10 most nutrient dense foods, and is packed with Vitamin A, folic acid, carotenoids, flavonoids, calcium, magnesium, potassium, and more!

What should I use my arugula for?

  • Salads! With a name like “salad rocket” it has to be great in salads. Mix some arugula and spinach together and add a salmon fillet and some balsamic dressing for a savory salad.  Grab some arugula and mix with strawberries or blueberries, pistachios or walnuts, goat cheese, and your favorite dressing.  Or come up with something delicious of your own – arugula mixes well with other greens or has a distinct flavor punch of its own that can be great in any creation
  • Add to your pasta. Once your pasta has been cooked and drained, add a handful of arugula and add to the noodles.  They wilt and create an awesome flavor and texture.
  • Use instead of lettuce on your favorite sandwich. Add a new flavor to your sandwiches.  Goes especially well with egg salad and turkey.
  • Add it to your pizza! Arugula adds a great fresh kick to your favorite pizzas.  Just add on your pizza right after it comes out of the oven (do not cook in oven because it easily loses its flavors and nutrients in heat.)  I believe Woodfire Pizza also uses arugula on some of their pizzas but to make one of your own see my recipe below:


Similar recipe for this pizza can be found at I’m bored-Let’s Go HERE

Tomato-Mozzarella-Arugula-Naan-Pizza

Similar pizza from I’m Bored-Let’s Go.  She suggests using delicious pancetta for hers! – check it out in the link above

Tomato, Bacon, Arugula Pizza

  • Small pizza crust (naan bread from the store works great)
  • Tomatoes, sliced (3 slices per pizza)
  • Fresh mozzarella
  • Arugula
  • Bacon, 2-3 pieces per pizza
  • Balsamic dressing for drizzling on top
  1. Preheat oven to 425 degrees
  2. Cook your bacon until crispy, drain, and set aside (covered  in paper towel to keep warm)
  3. Brush your naan bread or other crust will olive oil.  Top with 3-4 slices of tomato and desired amount of mozzarella.  Bake for 10-12 minutes until cheese is melted
  4. Top each pizza with fresh arugula and cooked bacon and then drizzle the balsamic vinaigrette dressing
  5. Serve and Enjoy! 1 pizza per person is usually a good bet

Hope you all pick up some “Salad Rocket” this weekend at your local Farmer’s Market!

-Nikki